| |
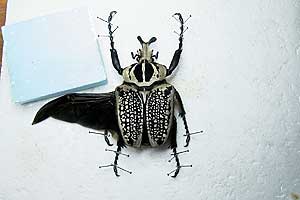
Some people like to mount their beetles
with their wings open.
Here are some easy to follow instructions. |
|

|
|
Hold your beetle firmly and with your left thumb, gently lift the
elytra on one side. The elytra actually lock into each other when the
beetle isn't flying, which gives the elytra a waterproof seal when
closed. |
|

|
|
You may have to gently lift and pull the elytra several times, before they
free up and you can get at the wings underneath. Take care doing this as you don't want to crack the elytra. |
|

|
|
Now that you can see the wings, grab the leading edge and gently pull the
wing out from under the elytra. As you pull it out it will automatically
unfold as you see here. Work the wing back and forth until it is quite free and easy to move.
Repeat the process for the other side.
|
|

|
|
Place the beetle on your foam board and set the legs into the desired
position. This will help to hold the beetle in place while you are manoeuvring
the wings. Because you are using a flat board, you will require another piece of
foam (or balsa wood) that matches the depth between the board and the base
of the wings. This additional board will bring the wings up to level, and your
specimen will look much nicer when you have finished.
|
|

|
|
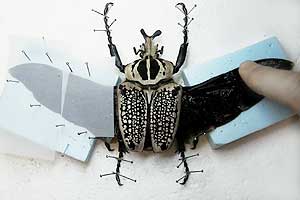
Now pin this extra piece to the main foam board with two long pins, this
will hold it in place. Move the left wing up into the desired position and hold in place with
your finger. You won't hurt the wing as beetles have no scales on their
wings to rub off.
|
|

|
|
Cover the wing with some tracing paper and pin around the edge of the wing,
This will hold the wing in place while it is drying.
|
|

|
|
Repeat the process for the right hand wing, and don't forget to pin the
extra mounting board in place to stop it moving. Now finally move the antennae into position and cross pin so that they are
held in place. Check that all the legs are in the required position.
|

|
|
If the wings are slightly in the wrong position, you do not have to
remove the paper. Just pull out the two pins that hold the extra block in place and move
this block into the required position. Because the wings are held to this,
they will move at the same time. Be careful that you only move the block a small distance at a time.
Don't forget to replace the two long pins to hold the block in position
after you have finished.
|
|
|
|
PREVIOUS PAGE
NEXT - Setting or Spreading |
|
|

